Table Saw Safety: Riving Knife, Push Sticks and Kickback
Kickback is the main table saw hazard. Use this checklist of guards, riving knife, fence habits and push tools to cut safely, and know what sensing features do.
 By BuyOnceChoice Editorial Team
Updated November 16, 2026
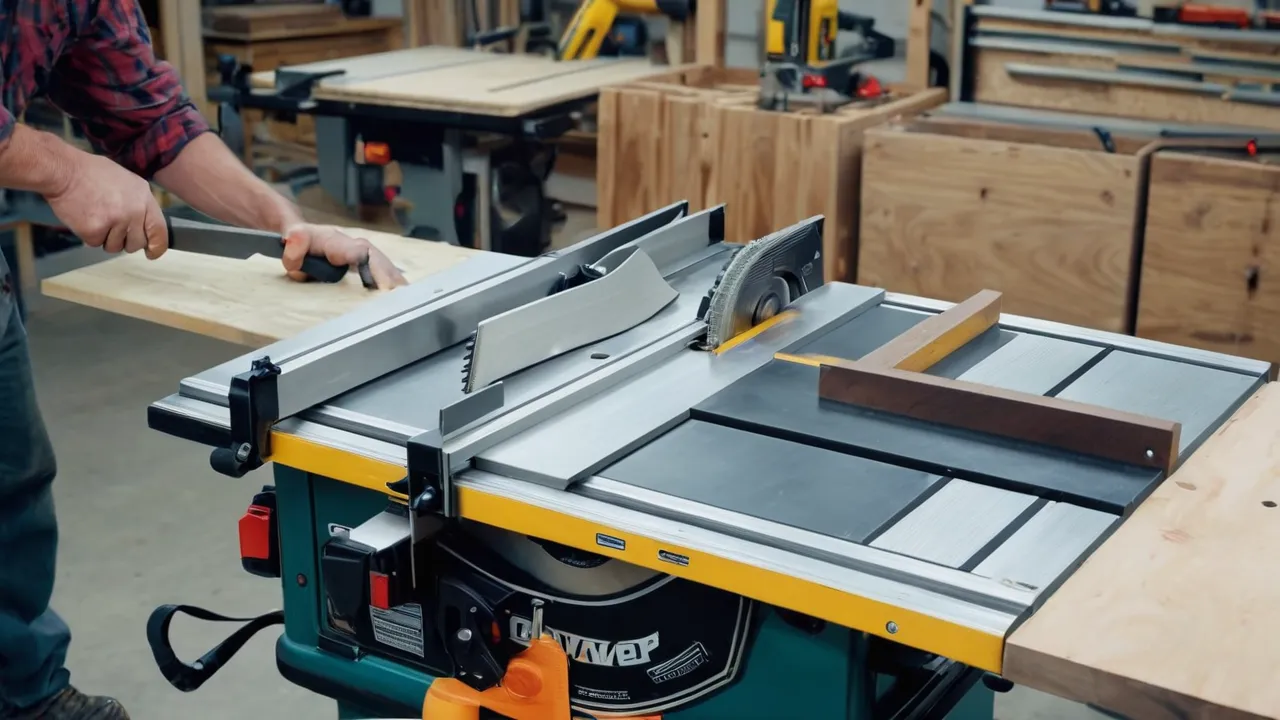
Table saw kickback is the sudden, violent throw of a workpiece back toward the operator when the blade grabs it, and the best defenses are a riving knife or splitter, a blade guard, a fence set parallel to the blade, push sticks and a stance out of the line of the blade. Follow your saw’s manual, wear eye and hearing protection, and never cut freehand.
What Kickback Is and Why It Happens
On a table saw, the teeth at the front of the table move downward toward the operator, and the teeth at the back of the blade rise up out of the table. If the wood pinches the rising rear teeth, they can lift the board and fling it toward you at high speed. Pinching comes from a board that closes on the blade after the cut, a fence that is not parallel to the blade, a dull blade, or wood that twists or has internal stress.
Kickback can also occur when a cut piece slides between the blade and the fence. For this reason, cut pieces must have room to move away without catching on the blade. Understanding the cause helps you spot trouble before the cut starts.
Not every kickback is a dramatic launch. Smaller events, such as a board that grabs and shifts, a loud bang, or a piece that spins on the table, are warning signs that your setup or your technique needs correction. Stop, shut off the saw and let the blade stop completely before investigating. Treat every near miss as information, and fix the cause before cutting again.
Common triggers at a glance
- A fence that toes in toward the back of the blade and squeezes the board.
- Lumber with a bow, twist or case hardening that closes on the blade after the cut.
- A dull or dirty blade that needs extra force.
- Using the fence and a miter gauge together on a crosscut, which traps the offcut.
- A riving knife that is removed or misaligned.
- Feeding while standing directly behind the board.
The Riving Knife and the Guard
A riving knife is a curved plate that sits just behind the blade and rises and falls with it. It keeps the kerf open so the board cannot pinch the back of the blade. A splitter does the same job but stays fixed and may not lower for non-through cuts. Use the riving knife for most cuts, and make sure it is aligned with the blade as the manual describes.
The blade guard covers the blade from above and often includes anti-kickback pawls that grip the board if it tries to move back. Guards can be removed for certain cuts, but the default should be to use them. If your saw has a guard system that is awkward, check whether an upgrade is available for your model from the maker.
Match the riving knife to the blade. Knives are sized for certain blade diameters and kerf widths. A knife that is thicker than the kerf will bind the wood, while one that is much thinner will not hold the kerf open. The manual lists compatible blades. If you change to a thin kerf blade, check that the knife still suits it, and if it does not, use the knife the maker lists for that blade type.
Fence and Workpiece Habits
- Set the fence parallel to the blade so the wood does not pinch.
- Never use the fence and the miter gauge together for the same cut.
- Keep the workpiece flat on the table and against the fence.
- Support long boards with outfeed and side supports.
- Do not cut warped or twisted boards without jointing one face first.
- Do not cut freehand, which has no fence or gauge to control the piece.
Stand slightly to the side of the blade, not directly behind the board. If kickback occurs, the piece travels along the line of the blade, and your body should be out of it. Keep your weight balanced and your feet planted.
Joint or flatten one face of rough lumber before ripping it. A board with a bow or twist rocks on the table and can pinch the blade. For sheet goods like plywood, use outfeed support and a helper, because the weight of a full sheet pulls the cut off line. For narrow rips, use a push stick that keeps your hands well to the side, and consider a different tool, such as a band saw, for very narrow strips.
Checking fence alignment
Alignment is worth checking whenever the saw is moved or the blade is changed. Unplug the saw, raise the blade, and measure from the miter slot to the front and the back of the blade teeth using the same tooth marked with a pencil. The two readings should match. Then bring the fence against the slot side and compare the distance to the blade at the front and the back. Many manuals describe the adjustment, and some allow the fence to sit very slightly open at the back, so follow yours rather than a rule from another saw.
Push Sticks and Feeding Technique
Use a push stick or push block for any cut that brings your hand close to the blade, and keep your hand at a safe distance, as the manual advises. Feed the work at a steady, controlled pace. Pushing too fast overloads the motor, and too slow burns the wood and can cause binding. Finish the cut by pushing the piece completely past the blade before releasing it, and shut off the saw before reaching near the blade.
| Situation | Safer habit |
|---|---|
| Narrow rip cut | Push stick, riving knife in place |
| Long board | Outfeed support and a helper if needed |
| Crosscut | Miter gauge, with no fence use |
| Cutting small parts | Use a sled or a jig instead of hands |
| Dado or non-through cut | Use the correct guard setup for the cut |
Make a few push sticks from scrap and keep them next to the saw so they are always at hand. A push block with a heel is useful for wide boards. Replace them when they get chewed up. A cut finished with a push stick past the blade is safer than a cut finished with a hand, and the habit costs nothing.
Flesh Sensing and Other Features
Some saws have flesh sensing technology that detects contact with skin and stops or drops the blade very quickly. It can reduce the severity of a contact injury but does not prevent kickback, and it may trigger on wet or conductive wood, which requires a bypass mode. It is a valuable backup, not a replacement for safe technique. Other helpful features are a blade brake, a magnetic switch that prevents restart after a power loss, and a large paddle switch.
Whatever the features, no feature replaces proper habits. Read what the maker says it does and does not do, and keep the saw in good repair. See the power tools category for related guides, and how we review for how we view safety claims.
If you are shopping, read the maker’s guidance on what happens after a trigger. Some systems sacrifice a cartridge that must be replaced, and a false trip may cost time and money. Learn whether you can bypass the system for wet or treated lumber, and how to do it correctly. A system is only useful if you understand it and keep it maintained, so read the manual and follow the service steps.
Setup, Maintenance and Protective Gear
Keep the blade sharp, the table clean and waxed, and the tools aligned. A dull blade needs more force, which raises kickback risk. Check blade alignment to the miter slot and the fence to the blade periodically. Use dust collection, since fine dust is a health risk and a slip hazard. Keep the floor around the saw clear, and light the work area well.
Make sure the saw sits stably on a level floor, and that the stand or cabinet does not rock. A portable saw on a bench should be clamped or fastened. Keep a clear space around the saw for moving long boards, and place the switch within easy reach. Know where the stop control is before you start a cut.
Wear safety glasses or a face shield, hearing protection, and a dust mask suited to the work. Avoid loose sleeves, gloves near the blade, jewelry and long hair that can catch. Wear close-fitting clothes and sturdy shoes. Never operate the saw when tired or distracted, and keep children and pets away from the shop. If you are new, a woodworking safety class or an experienced mentor is worth the time.
A short pre-cut checklist
- Unplug the saw when changing the blade or adjusting the knife.
- Confirm the riving knife or splitter is installed and aligned with the blade.
- Confirm the guard and pawls are in place unless the cut requires otherwise.
- Check that the fence is locked and parallel to the blade.
- Set blade height so the teeth rise only a little above the wood.
- Clear the table and plan where the offcut will go.
- Place your push stick within reach, and set up outfeed support for long stock.
- Stand to the side, switch on and let the blade reach full speed before feeding.
Frequently Asked Questions
What causes kickback on a table saw?
Kickback happens when the rising rear teeth of the blade catch the workpiece and throw it toward the operator. Common causes are a board that pinches the blade, a fence that is not parallel, a missing riving knife, a dull blade, warped lumber, or using the fence and miter gauge together.
Do I need a riving knife on a table saw?
Yes, for most through cuts. A riving knife keeps the kerf open behind the blade so the board cannot pinch, which is the main cause of kickback. Use the knife the maker lists for your blade, and remove it only for cuts that cannot be made with it in place.
Where should I stand when using a table saw?
Stand slightly to one side of the blade, not directly behind the board. If a piece kicks back, it travels along the line of the blade, so your body should be out of that path. Keep your feet planted and your weight balanced, and use push sticks for close cuts.
Does flesh sensing stop kickback?
No. Flesh sensing detects contact with skin and stops or drops the blade, which can reduce the severity of a contact injury, but it does nothing to prevent the board from being thrown. Rely on the riving knife, guard, fence setup and good technique, and treat sensing as a backup.
Final Thoughts
Treat the table saw with respect. Use the riving knife and guard, set the fence parallel, stand out of line, use push sticks, support long stock, and keep the blade sharp. Consider flesh sensing as a backup, not a plan. A calm, prepared routine prevents most accidents, and a short checklist taped to the saw makes it easy to follow. Pair it with the guidance in the manual and a look at the miter saw category for crosscut safety.
Related buying guides
- Third Party vs Genuine Cordless Batteries: Risks
- 12V vs 18V vs 20V Max Cordless Tools: Pick a Platform
- Amp Hours Explained: Cordless Battery Size and Runtime
About the author

The BuyOnceChoice Editorial Team researches durable products worth buying once. Our guides compare published specifications, warranty terms, expert review consensus, and verified owner feedback. We do not conduct our own product trials. See How We Review and our Editorial Policy for our standards.