How to Organize a Chest Freezer to Waste Less Food
How to organize a chest freezer using bins, zones, labels, and rotation habits, with a layout plan for meat, produce, meals, and bulk buys.
 By BuyOnceChoice Editorial Team
Updated November 16, 2026
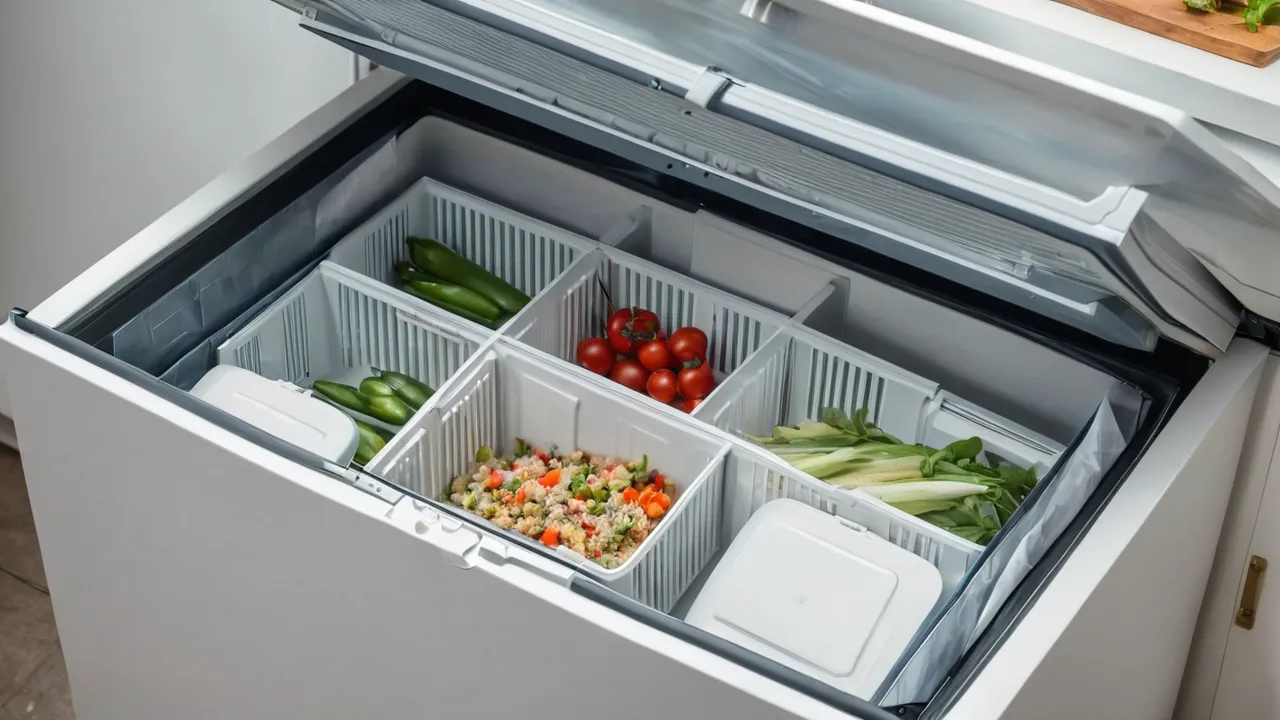
To organize a chest freezer, divide it into zones with stackable bins or baskets, label each bin, keep a simple inventory list, and rotate food so the oldest is used first. Freeze items flat in labeled bags, keep a clear path to the compressor area, and defrost on schedule if the model is manual defrost.
Why a Chest Freezer Gets Chaotic
A chest freezer is deep and open from the top, so items sink to the bottom and get buried. Without structure, you dig through layers of frozen blocks to find one bag of peas, you lose track of what you own, and food gets freezer burn from sitting too long. Cold air stays in a chest when the lid opens, which is efficient, but long digging sessions let warm air in and raise the load on the compressor.
The fix is to turn the chest into a set of drawers. Bins, baskets, and a plan convert a deep pit into shallow, labeled sections that you can lift out and put back.
Bin Systems That Work
Stackable bins and baskets
Most chest freezers come with one hanging basket that rides on the rim. Add stackable bins in a few sizes that fit the width and depth of your model. Measure the interior, then choose bins with straight sides that can be stacked without crushing food. Use bins with handles that you can grab with cold hands. Many owners use collapsible crates or the same plastic bins used for pantry storage, as long as they are rated for freezer temperatures and do not become brittle.
Dividers and shelves
Some freezers include dividers. If not, tension rods or wire dividers can separate sections. A flat shelf at the top level lets you keep frequently used items within reach. Avoid blocking the airflow vents or pressing bins against the interior walls, since this can limit cooling around the evaporator plates in some designs. Follow the manual’s guidance.
Bags and flat freezing
Freeze liquids and ground meat flat in zip bags, then stack them like files. Flat packs freeze faster, take less space, and thaw quickly. Press out the air, leave a small gap for expansion with liquids, and label with a marker. Use freezer-grade bags or containers, which resist moisture loss better than thin sandwich bags.
Zones: A Layout Plan
Think in zones, and set bins for each.
| Zone | What goes there | Position |
|---|---|---|
| — | — | — |
| Meat and poultry | Raw meat in sealed packs | Lower bins, away from cooked food |
| Fish and seafood | Sealed bags | Separate bin with a label |
| Vegetables and fruit | Blanched or flash-frozen | Mid-level bins |
| Prepared meals | Labeled containers | Top bin for quick access |
| Bulk and bread | Bread, tortillas, baked goods | Top shelf or side |
| Ice and odds | Ice packs, ice cubes | A small basket |
Keeping raw meat in a bin separate from ready-to-eat food reduces cross-contamination risk. Place raw meat low so that any leak does not drip onto other items, and use sealed packaging to prevent drips.
Inventory and Rotation
An inventory list keeps you from buying duplicates and forgetting items. Tape a sheet or whiteboard near the freezer, or use a phone note. Write each item, the amount, and the date frozen. Cross off items as you use them.
Rotate using first in, first out. Put new items at the bottom or back of a bin and move older ones to the front or top. Label every bag with the contents and the date, using a permanent marker or labels designed for freezers. Review the list monthly, and plan meals around items that have been there longest. Food safety guidance says food stored at 0 degrees Fahrenheit stays safe indefinitely, though quality declines over time, so rotating helps preserve taste and texture.
Freezer Burn, Packaging and Upkeep
Freezer burn is dehydration on the surface of frozen food, which leaves gray or white dry patches. It is not unsafe, but it hurts flavor and texture. Prevent it by removing air from bags, wrapping meat tightly, and using airtight containers. Do not leave food in thin store packaging for long storage. Vacuum sealers help, and some owners wrap items in plastic and then foil or butcher paper for long storage.
Maintenance Notes
If your chest freezer is manual defrost, plan the organization around defrost time. Keep bins that can be lifted out and moved quickly into coolers, and keep a cooler near the freezer. Do not stack food above the load line marked in the freezer, if there is one. Vacuum the coil and check the gasket on the schedule in the manual. A full freezer is more efficient than a mostly empty one, so fill the gaps with containers of water or frozen blocks if you have extra space. Our freezer guides cover defrost types, and our home appliances hub list related upkeep guides.
Set-Up Day: A Walkthrough
A Set-Up Checklist
- Set coolers beside the freezer and move food into them by group.
- Throw out anything unlabeled, badly freezer-burned or older than you would eat.
- Wipe the interior and check the gasket while the lid is open.
- Measure the interior, then place bins in lengthwise with a narrow aisle or lift-out basket on top.
- Load by zone: raw meat low and sealed, vegetables mid level, prepared meals and bread on top.
- Label each bin end and each bag with contents, amount and date.
- Write the inventory list and tape it near the freezer.
- Put a thermometer in the top bin and confirm it reads at or below 0 degrees Fahrenheit.
The best time to organize is when the freezer is low, and a defrost is due. Plan an hour or two. Set coolers beside the freezer, and move everything into them in groups. As you go, throw out anything unlabeled, freezer-burned beyond use, or old enough that you would not eat it. Wipe the interior if the freezer is empty and warm, and check the gasket while the lid is open.
Next, decide the layout. Put the bins in first, lined up along the length of the freezer, leaving a narrow aisle or a lift-out basket on top. Group like with like, label the end of each bin facing up, and then load food back by zone. Put the heaviest, longest-term items at the bottom, such as large roasts and bulk meat, and lighter items such as bread and bags of vegetables above. Place the items you use weekly in the top bin or the hanging basket, so you can grab them without moving anything.
Labels That Actually Help
A good label has three parts: what it is, how much, and the date frozen. Add a use-by hint, such as a month or a season. Waterproof labels or masking tape and a marker work well. Write on the flat side of the bag before filling, since writing on a full bag is hard. Keep a spare marker taped to the freezer lid.
Keeping the System Alive
A system fails when it is complicated. Do a five-minute review each month. Move older items to the front, update the inventory sheet, and plan a couple of meals from the oldest packs. After each big shop, put new items at the back and shift older ones forward. Before a long vacation, consolidate and fill empty space with containers of water, which hold cold if the power fails. Keep a freezer thermometer in the top bin, and check that it reads at or below 0 degrees Fahrenheit.
Decision Rules
- Deep chest with lots of bulk buys: use bins in several sizes and an inventory list.
- Small chest for a couple: use two or three bins and flat bags.
- Hunter or gardener: separate bins for game, fish, and produce, with dates.
- Meal prepper: label containers with the date and reheating note, and keep them on top.
- Frequent power cuts: group items in tight bins and keep the lid closed.
- Rental: use stackable bins that you can take with you.
See also the How We Review page for how we weigh storage claims.
Keep the checklist in a drawer near the freezer. When you re-organize each season, you can run through the same steps in less time and avoid starting from scratch.
Frequently Asked Questions
How should I organize a chest freezer?
Divide it into zones with stackable bins, label each bin, keep an inventory list and rotate food first in, first out. Freeze liquids and ground meat flat in labeled bags, stack them like files, and keep raw meat in sealed packs in lower bins away from cooked food.
How full should a chest freezer be?
A reasonably full freezer holds temperature better and is more efficient than a mostly empty one. Fill gaps with containers of water or frozen blocks if you have extra space, but leave room for air to move as the manual indicates, and do not stack food above the load line.
Can I put hot food in a chest freezer?
No. Cool food first, because hot food raises the internal temperature and can partially thaw nearby items. Divide large batches into shallow containers or flat bags so they cool and freeze quickly, and label them with the date so you can use the oldest first.
How do I stop bins from freezing to the bottom of the freezer?
Place a cardboard sheet or a thin plastic mat under the bins, and avoid spilling liquids when you load. If a bin does freeze in place, do not pry it with a metal tool, since that can damage the liner. Defrost the area as the manual directs.
Final Thoughts: Build Drawers, Keep a List
A chest freezer works best when it behaves like a set of labeled drawers. Use bins, flat bags, zones, and a simple inventory with first-in first-out habits, and the freezer will save money instead of hiding food.
Related buying guides
- Manual Defrost vs Frost Free Freezers: Pros and Cons
- What Size Freezer Do You Need: Cubic Feet Guide
- Chest Freezer vs Upright Freezer: Which Should You Buy
About the author

The BuyOnceChoice Editorial Team researches durable products worth buying once. Our guides compare published specifications, warranty terms, expert review consensus, and verified owner feedback. We do not conduct our own product trials. See How We Review and our Editorial Policy for our standards.